Well, this particular project started off this morning when I covered an old project (gone very wrong) with gesso! (I was super hopeful that I could turn it around!) I had this little sketch in my sketchbook that has been begging to be created and this canvas seemed perfect!
With a picture plan, the first step is to color the background. Watercolor in the brown posts with either brown watercolors or paint. Then use (my favorite way to get down color fast) . . . gelatos!! Color all around the white gesso with the gelatos. Use a wet brush and give the green gelatos a spin! They move around the gesso really easily! I tend to leave the edges darker!

While you let the background dry, get
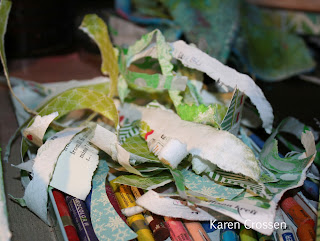
out some aggression on green pattern paper. Rip up little strips to
look like grass or weeds, (whichever you have more of in your yard!)
You will need more than you think you will so make sure to rip up a
good pile!
Use either Gel Medium or a
Mod-Podge-like glue to get the green pattern paper down! Put a
couple down and then layer more on top of that! Your fingers should
be good and gluey at this point!!
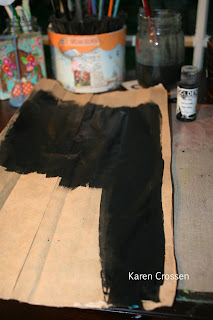
Beside my desk on the floor was a brown
paper bag, but feel free whatever paper you don't mind painting black
for the next step. Just get some black paint down! Draw and cut out
a shape of a metal hanger! Size it to match the size of the canvas
that you are working on! (This was a tricky-ish step, so just be
prepared to paint something else black if you need more than one
try!!) Then once you have it sized, glue it onto the canvas. If you
think the black is too dark, use some gray paint to lighten it up a
little!
Now for a little pop of color with
flowers! Just draw little white circles with a heavy body paint or
modeling paste. Let them dry. Pick a fun paint color and paint on
top of the circles with color! (I took out my handy-dandy color wheel
and lined up the green grass, yellow for the birdhouse and voila,
violet was missing color!)
Finally, it is time to highlight!! Take
out some Faber-Castell Pitt Pens that match the greens and a couple
of grays! Go around the edges of the paper with greens to make them
pop! I also like to use the grays and black markers to do the same
but make shadows appear behind them. Use fine-tip black and white pens to
doodle and do some more highlighting at this point!
Draw the birdhouse on watercolor paper.
Then watercolor away!! After it dries, use pitt pens to go around
the outside and intensify the edges! (Love this step!)
Glue the birdhouse onto the canvas when
it is dry! Take some twine or ribbon and make it look like the
birdhouse is hanging from the hanger!! I used twine and mod-podged it
down!
Now, I used a deep-edge canvas for this
project. I find that the edges bother me when they are white so I
tend to paint them or cover them. Since this is kinda an outside
looking pic, I took some burlap and went around the edges. It is a
super easy way to give a good looking finish!! Measure out the burlap
and glue it on with gel medium or mod-podge! Super easy and it looks
amazing!
Then step back and enjoy what you did!!


I had no idea there was so much texture from the final photo! this is great instructions! I love it! You are so cool!
ReplyDeleteThis is adorable, Karen! You did a great job, too, with your step by steps ... B.
ReplyDelete