Monday, January 13, 2014

$3.63 = My New Desk!!

One of my friends had this awesome desk that was just too big for her house ...  lucky for me!! A foot longer and a foot wider than my old desk - it gives me SO much more room to make a mess!! I am SO excited!! 

  
But I was really worried ... my last desk was a complete mess of dried paint, glue and permanent spray!!  I really didn't want to ruin this desk too! 


After a little bit of research, I found that I could get a sheet of plexiglass cut to fit my desk . . . but it was pretty expensive.   I knew I didn't want to spend the money on plexiglass ... I turned to Pintrest, of course, and I found a desk that had been redone with oilcloth!! Too cute!!  I got in my car and headed to JoAnn's this morning.  Unfortunately, the oilcloth selection was pretty slim and ugly.  But on the bottom of the vinyl/oilcloth display was clear vinyl . . . BINGO!!  1 yard extra wide was $6.99 - steal!! Amazingly, I was prepared and had a JoAnn's coupon . . . 50%!!  Whoohoo!!  1 yard of clear vinyl $3.63!!!  And it totally satisfied my, 'I have to do this now' feeling!


I took out my toolbox and staple gun!!  (I know it is pink . . . but my husband gets really tired of me putting his tools back 'wrong.' Even though my way of organizing makes MUCH more sense!!)  And I stapled the vinyl to the underside of the desk! 


I honestly have no idea how the vinyl is going to hold up.  And it doesn't stretch all the way to sides of the desk, but for now I will give it a go!! But it looks good and I can even put cute paper or mementos under the vinyl and see it!! Oh, I really hope it holds up!!  


And now . . . I have the fun project of redoing my old desk!! Bring out the sandpaper and paint!! Yeah, another project!!

Friday, January 10, 2014

Loving my Faber Castell Gelatos!!

 If you remember a couple of days ago, I posted a picture of a watercolor I did in my art journal of bleeding heart flowers.  The view from my desk is SO drab and cold right now, I just wanted some flowers to brighten my view.  Well, little did I know, but these flowers actually do grow in the winter!! Made my day!!

I took the pic from my art journal and altered a wooden block with modeling paste, paint, paper and glue to create a piece of art!


The very first thing I did was color my modeling paste with a red Gelato.  I made three little plops (real technical term, huh!) and mixed in different amounts of Gelato.  Of course, the more you add the darker color!


 By making three different colors you make color variations and provide more dimension to the shapes!)  Usea palette knife or plastic knife to cut off the color and chop it up and smear it into the modeling paste.


 The Gelatos help keep the consistency of the modeling paste the same because when you add paint or ink, the paste tends to become more liquidy (another technical term!) The thickness of the modeling paste allows you to make actual embellishments of your own.  I wanted to make hearts, I took out an old heart stencil, put it down on wax paper and pushed the colored paste into the stencil.  When you pull up the stencil, it leaves behind the shapes!!  Love it!! 
You have to let it dry which can take a while depending on the thickness of the paste.  At this point, put the wax paper up and don't touch it!! Trust me, you be more frustrated when you ruin your work by touching them before they are dry . . .24 hours people!!


If you don't have Gelatos, you can use your Faber Castell Big Brush to color the modeling paste!!  Put down a 'plop' of modeling paste on a craft sheet.  Then literally color onto the craft sheet.   Mix the paste with the ink and VOILA colored paste!! (Plus, it uses SO little it keeps the consistency the same the Gelatos do!)

(I had already added some color from the pen before I took this pic! Sorry!)


The second step is to prep your surface.  I am altering this piece of wood (best Christmas present this year, was a big box of wood scraps . . . just takes little things to keep me happy, seriously!)


Gesso and lay down patterned tissue paper onto the wood! This makes a fantastic background texture!!


After the gesso dries, paint the background!  I used Titan Buff  in the middle and Carbon Black around the edge.  The black edge really helps make a 'frame' around the picture! When the paint is dry, I used my Faber Castell Cold Grey III around the edges to help blend the 'frame' to the middle!) Plus, it also provides some dimension here too!


Third step, create the stems and leaves!!  Pull out all your green Gelatos and Big Brush Pens!!  I gesso'ed a white piece of cardstock and drew on the leaf shapes onto the gesso.


Now, I kinda experimented here.  One side of the paper I kept dry and just used my finger to blend the three green colors.  On the other side of the paper, I used a wet brush to combine the colors.


Then I used my green and brown Faber Castell Pitt Pens to highlight the leaves.  I like both types of leaves.  The watercolor leaves are a little softer looking ... the smudged ones are a little crisper!! So I used both because I couldn't choose which ones I liked more!!

Since we need stems too, color Gelatos to randomly onto a piece of paper.  I took a wet brush to combine the colors and stamped it up to make some texture!!


 Use this paper to cut out stems for the flowers.  (Before I cut out this paper though, I made some out of scratch paper to get the size right. I get SO frustrated when I cut my 'good' paper the wrong size and have to do it again!!)


 So now, if 24 hours haven't passed by, you have to take a break.  But if they have . .. then you can pull your hearts off the wax paper!!  SO FUN! I LOVE this technique!!  


Assemble all the pieces onto the wood board! I used matte medium to 'glue' the pieces down.  You could also use decoupage glue also, but I like the texture of the matte medium and my fingers stay cleaner!


Finally, come the finishing touches!!  I use my Faber Castell Pitt pens to highlight.  I used the reddish color around the edges of the hearts.  Then I used the fine tip pens to go around everything - it really is an important finishing touch.  I also use the Cold Grey III to shadow the pieces! The pens give the project pieces a POP!


I have several books full of famous (and not so famous) quotes.  I found this quote by Henri Matisse and I just thought if fit my winter flower blues SO well!! I typed it on my computer, printed it out, cut it up and glued it down onto the board.  Finally, added some rub-ons for texture, signed it and DONE!!


http://eclecticpaperie.blogspot.com/2014/01/hearts-january-get-altered-challenge.htmlSo, now join us at the Get Altered Challenge at ePaperie! Sue has a wonderful challenge going on using, hearts!!   And as always, you can find the fabulous supplies I used at the ePaperie!!

Wednesday, January 8, 2014

Today's mojo!

I can't even begin to tell you how good it feels to have time to sit at my desk and just get messy for no reason at all. I just feel the Mojo!! Plus, the warm sun is just streaming in at my desk and it feels SO good!! Now that is a new year and the kids have finally gone back to school, I am ready to get down to business and create!! 

I have had a Donna Downey inspiration journal for a couple of years.  It has been sitting in my cabinet waiting, for me to get over, 'the it has to be perfect to go into that journal' feeling I had whenever I considered using it.  Silly, I know.  But I grabbed it out this morning and began inking it up - it wasn't as scary as I thought it would be.  There are imperfections on this page and I survived!

Last week I joined a online art journaling group, Journal 52.  The group has a new prompt every week and the first prompt for the year was Up, Up and Away.  And here is what I came up with for this week. 

 I loved the quote - it hits close to home!! 


I used a Linnie Blooms Sunflower for the nest and some of the other products I used are available at the fantastic ePaperie!

Tuesday, January 7, 2014

Bleeding Hearts

I was brainstorming what to do for my Get Altered Challenge for the ePaperie, the topic is hearts for this month. I was staring out the window at my desk.  All I could think about was how dreary it looked out there; no flowers, no leaves, just brown and frosty. What do I wish that I could see?  Flowers.  So here was my thinking went, flowers that look like hearts, bleeding hearts!  I love these flowers!  This is my watercolor for my art journal . . . now how to make this an Altered challenge . . . what art supplies should I pull out today???


Monday, January 6, 2014

Happy New Year!!

Hi Everyone!! I feel like I haven't blogged in forever!! I finally got to my desk yesterday, to sit and create.  It felt good.  I got messy and used new art supplies.  I also got to drool at my Altered Angel gift card . . . ahh, I am going to try and wait for the new CHA stuff ... try anyway!! I hope to get there this week since the girls will be back to school!

So , this is what I did in my journal yesterday for my ePaperie Post. I saw a picture of a party scene like this on pinterest and decided to recreate it. I love looking on pinterest or craftgawker for inspiration photos!! I take my sketchbook and draw what inspires me, then I seem to always find an idea that means something to me later on!  This party scene spoke New Year's!


I started out mixing blues and grays to create the background color.  I thought that I would like a polka-dot background but instead I pounced circles, as randomly as possible, onto the outside edges of the page. (My art journal is an old cookbook, so you can kinda see that I am just about to enter the bread recipe section through the paint!)


 I pulled out my Fancy Pants Collecting Moments 6x6 pad and started cutting!! Actually, before I cut my final paper shapes, I used some scrap paper to cut out shapes.  By cutting out practice shapes, I get the right sizes and placement without getting frustrated ruining my favorite papers. 

I used an old Wendy Vecchi Art Part for the cake stand.  Again, I had to mix paints because I didn't have the exact color that I wanted for the blue stand! (I am not picky about colors at all . . . haha!) 


This New Year's quote covered just about everything for the new year.  And I really didn't make any resolutions this year, I just want this to be a really Happy year!! 


I hope that you all have a wonderful artsy New Year filled with lots happiness!! Any of these amazing supplies you can get a the best online store around - ePaperie!!  Happy Shopping too!!  -  Karen

Thursday, December 19, 2013

Eclectic Paperie 12 Days of Christmas . . . Day 10 . . . Silks Acrylic Glazes!


Oh my goodness EPeeps!! Only 2 more days of the ePaperie 12 Days of Christmas . . . but boy, do I have a fun product today!! 

Silks Acrylic Glazes!!


 I am IN LOVE!!  Colors, shine, and SO super versatile!  I stamped with them, I embossed with them, stenciled with them and just plain painted with them!! 

So, today go on over to the Eclectic Paperie and take advantage of the deal of the day . . .

Make sure you use the code:   12DAYS10 when checking out to get your discount!!  What's the deal today? Silks – Buy 3 for $15.99   What a deal because normally buying 3 is $21 ... I know I will be adding to my collection today!! 


I had so much fun that I ended up with a ton of little experiments that I loved . . . yikes, what to do . . . so I cut them up and sewed them together as my patchwork Christmas quilt canvas!!


So, honestly, I had the flu when I started on this project. I sat in bed and watched a ton of YouTube videos about Silks Acrylic Glazes.  There were SO many ideas out there.  My head was swimming (and full of decongestant) so I just experimented!

I stamped - circles and hearts . . .
I put the Silks Glaze on my craft sheet, dipped my stamp into it and stamped it down! I painted the watercolor paper with one coat of Silks Glazefirst!


 I stenciled with embossing paste too.  First I painted one color of Silk onto the paper and after it dried, the snowflake is painted through a stencil! No bleeding under the stencil! (And the stencil is made from paper) 


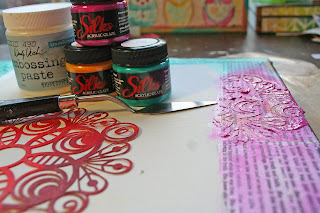
I embossed - by mixing the Silks glaze with Wendy Vecchi translucent embossing paste and pushed it through stencils! Love the shine and the texture!! (I think this was one of my favorite techniques!!)


To Create the 'quilt'  I cut up all my little experiments and wrapping paper squares into 2x2 squares.  I glued them down to a piece of cardstock paper and let it dry.  Then I took out my sewing machine, and zig-zag stitched around all the pieces. 


Then I decided the 'quilt' needed a home ... so I got a canvas ready.  I put Christy Tomlinson coffee filter paper around the edges down with matte medium.


I painted the edges of the canvas. The Silks are translucent, so you can see every word from the paper underneath! I also got a little crazy with the embossing technique around the edges too . . . and then I glued it all together!!


This was such a fun project!! I hope you enjoy playing with Silks Acrylic Glazes, I think they might be a new favorite around here!!

HINT HINT!!  Now I was also practicing for my ETeam picks challenge ( using wrapping paper in your project.) So make sure this holiday season that you are keeping scraps of wrapping paper to use in a project with me in the future!!