Saturday, November 30, 2013

A Little Birdie Told Me . . .

 I hope you all had a wonderful Thanksgiving!! I made this little guy while sitting with my good crafty friends last week and catching up after a couple of months of crazy!  It is amazing how just a couple of hours of creating something makes me feel like I am ready to tackle the world again!! I know we are all ready to gear up and officially start the holiday season, just remember to take time for yourself and make some great art this season! I hope you enjoy my little bird from my 'artsy' day!


I started off by recycling this little frame that I found at Goodwill.  I loved how it was just a little box, waiting to be re-created and it was only .50 cents!  I gessoed it and then covered it wtih the ADORABLE Fancy Pants Happy Go Lucky Paper!!  SO pretty!!  


I cut out the bird, some flowers and a stem! Then I used my FAVORITE Matte Medium to glue them all into place! I used teal paint to paint the sides and distress ink to distress the edges! 

\
I chose the ticket from the Fancy Pants Happy Go Lucky ticket pack and glued it to the edge.  I loved the sentiment, Life is Short, Choose to be Happy!  SO great!


Doodles and Washi Tape finished off the project!

Thank for stopping by today!! Go, procrastinate from something you have to do today and create!! 
- Karen


Friday, November 22, 2013

ETeam Picks Challenge - Recycling!

SO much fun here today!!  Come and play with our ETeam Challenge!! 


The eTeam Picks Challenge is held on the third Thursday of each month and each challenge is an opportunity for you to be inspired by one of our eTeam’s creations and to be entered into our challenge prize drawing! 


The eTeam Picks Challenge is all about inspiration and having fun! During each challenge one of the eTeam members will share a topic, word, technique, sketch, or product that will become the foundation for your creation. This challenge is all about mixing it up and just enjoying the creative process of feel free to share a journal page, card, scrapbook project, mini album….Anything goes! We want to see your work and hear about your inspiration!

All of those who play along with our challenge will be entered into a prize drawing for a $15.00 gift certificate to the eclectic Paperie store.


Here is my Recycled Project . . . a Starbucks Frappachino Bottle! 
Over the weekend my friend gave out apple cider in these cute bottles at an event!  She had been saving up the used frappacino bottles and now I have turned into a vase or a pencil holder!!  It has actually been recycled twice now - love!
 

I painted the inside with teal paint.  I watercolored a cute little scene, cut it out and glued it on!   This was so much fun and I LOVE recycling and repurposing!!  


And down here in Georgia, we have beautiful flowering plants called Camillias.  I love them! We have red ones, pink ones .... honestly,  tons of beautiful flowers in the middle of fall and winter.  So lucky! 


Your turn now . . . find something to recycle and come on over to the Eclectic Paperie Blog and play with us!!

Gaby's Window . . .

At the Holiday Bazaar that I participated in last weekend, I had a request for a special piece.  I was excited but at time kinda scared that what I made wouldn't be right.  So here it is . . . dropping it off today.
 

Wednesday, November 20, 2013

Hi Linnie Bloom Fans!! This week I was lucky to get to work with Linnie Bloom Bird Shapes! I LOVE them!! 

This piece was inspired by an old vintage Christmas card I found on Pinterest.  I loved the old fashioned street lamp and wonderful Christmas robins.  When I thought about my Linnie Shapes, I knew the birds could make the piece really pop!


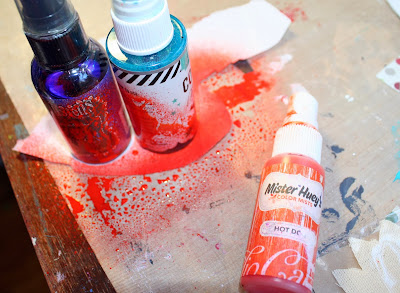
Using spray on the canvas pieces makes wonderful color! Sprays really stand out on linnie shapes! First,  I cut a piece of paper to match the shape of the bird wing.  I put it onto the canvas and held it in place with spray bottles, (I just needed another hand!!)


You can really see how crisp the line stays with spray!! No bleeding at all! 


I did the same on the other side with blue spray!!
 

And this is a final bird with some pen work and rub-ons for details! 
 

The paper branches really curl up off the canvas. I just nestled the birds right in!


Thank you all for joining me today!! I hope you really enjoy playing with your Linnie Bloom Shapes and Canvas!
Make sure you hop over to Linnie Blooms and get your shapes! You can also check out our Designer Blog and Pinterest Page for more ideas!


Tuesday, November 19, 2013

Just Art Journaling today!!

Well, it has been a crazy last few weeks.  Today was the first day that I got to sit down and go crazy with my art supplies!! My hands are inky and the mod-podge is peeling off . . . so I know it has been a good morning!

My first bazaar went REALLY well!! I chose a booth in a little quiet corner, and yet, everyone who came to look ended up buying something! I think I actually sold about 3/4 of what I came with.  So it made me feel me feel really good about my work.  I had a few requests for custom pieces, but I am not sure how that will go . . . but I will try!!

Today's crazy pages . . . the first one's scraps led to the second one . . . love when that happens!


Thursday, November 14, 2013

Getting ready for my first Holiday Bazaar . . .

My first bazaar is this weekend. So exciting, yet I am SO nervous!! These are a couple of the pieces that I made to sell ... wish me luck!!


Wednesday, November 13, 2013

Linnie Blooms Flourish Pockets!

Hi Linnie Bloom Fans! I am SO excited to be here to show you what I made with my flourish pockets this week!! These pockets are wonderful!!  I had so many different sketches done, it was hard to decide what to make. 

The Toys-R-Us catalog arrived in the mail the other day.  My girls took it out of the pile and smiled at me before delving into the pages, pens in hand . . . so I knew the Christmas fun had begun.  Inspired by those fun lists, I used these pockets to make a Santa's List board!!
 

I started off with some vintage Christmas images that I found on Pintrest and printed out! 


I tore the papers up and collaged them onto a long canvas. I wrinkled them and distressed the papers!

 
I painted the canvas for a brown backgound!


And then I started with the pockets!! I had so much fun stamping them, distressing them and gluing paper on them that I actually didn't even take pictures.  I completely forgot until they were done!


I hope you all enjoyed my Linnie Blooms Flourish Pockets Project!! I certainly love using Linnie Canvas Shapes!!
- Karen

Tuesday, November 12, 2013

Peace Dove Wreath!


Whew, it has been a crazy few weeks around here! First, I participated in the Atlanta Susan G Komen 3-Day, which is an amazing event!  Then I traveled overseas to visit my Granny for 2 weeks, which was an amazing event in itself.  It was so wonderful to see my family!! Then I had a ton of meetings at school this week and now I am getting ready for a wedding this weekend that my girls will be taking part in, and on Sunday I have a fundraiser Holiday bazaar . . . aaagh . . . so I needed some Peace.  Luckily, I managed to wedge in some art time in here. And here is my Peace dove that I made for my Design Team post at the Eclectic Paperie! 


I started with some vintage dictionary pages.  In order to save some of my favorite pages, I copied them on my copier and mishmashed them together to create some collaged dictionary pages. 

My wonderful father-in-law brought me a bag full of wood scraps!! SO excited!! I really enjoy working on the wood pieces!


I covered the wood in the dictionary pages and sheet music.  Then used stencils and distress ink to give the background some texture and color.

I took out my new translucent Wendy Vecchi Embossing Paste from the Eclectic Paperie.  I have been wanting to find the right project for it!! When I first saw the embossing paste it reminded me of a soft modeling paste. I love making stencil shapes with paste, so I thought, why not, use the embossing paste!!  And it worked!! 


At first it is white . . .


And it dries translucent!! SO awesome looking!! (Next time I will find a use for clear shapes!!) 


Then I used two different mediums to color the paste just because I wanted to see what the outcomes would be like.  The dylusions spray kept the shapes pliable and kinda translucent.  The craft paint made the pieces harder and opaque. I loved them both and used both in the 'wreath.'


I glued the shapes down with matte-medium!  I loved the wreath, but it was missing something.


So I water-colored my peace dove . . . 
 

And 'hung' her up with some red and white twine.

Added some rub-on stickers, red berries and paint, doodles and words . . . and done.  Some peace . . .  I hope you have some moments of peace before the holiday rush begins!! 


Make sure to visit the Eclectic Paperie, there are some AMAZING designers and an AMAZING selection of tools to use for mixed media and scrapbooking projects!!